
Ten years ago my parents made me a nice, wonderfully sturdy ottoman for Christmas. This poor ottoman was built well, thankfully, because it made it through the rough-on-furniture toddler/preschooler/big kid years with nary a wobbly leg. Not to mention about 10 moves (including a cross-country move).
I forgot to get a “before” shot, but here’s a close up of the fabric:

Obviously, it was dated and not my style any more. My parents made this for me when we lived in Idaho and I was going for a sort of contemporary rustic lodge look.
Recovering this ottoman has been on my “to-do” list for a couple years at least, but I was kind of intimidated by it and I’m not going to name names, but someone basically told me I shouldn’t even attempt it for various reasons. But I love him anyways. A few weeks ago I sucked it up, put on my big girl panties and started prying the trim off of it and ripping off the upholstery. It went surprisingly fast and I even managed to not ruin the trim around it (I wasn’t sure if I wanted to reattach the trim again after recovering the ottoman or not).

After removing the foam and prying out nails and staples, I decided I liked the look of it without the trim. It had a slightly more industrial look that way. I stained the wood that had been previously covered by the trim with some stain I already had.
To recover the ottoman, I wanted to go with something simple but with a little texture to it. Last year, I made a small ottoman when I redid the school room and I upholstered it using part of a canvas drop cloth. I love the look of it, so I decided to shop my garage and dug out another drop cloth that was tucked away in the bottom drawer of the toolbox.
I took the easy route and used spray adhesive (after talking to my mom who made it with my dad in the first place) to attach the fabric to the foam.
After everything was dry, I racked my brains trying to figure out how to attach the cushion to the base of the ottoman, and realized I still hadn’t tufted it. So I purchased a couple of packages of buttons from Walmart, covered them in scrap pieces of canvas, and went for it.
I used a light colored pen to mark the holes on the fabric so that I would know where the tufts would line up with the pre-drilled holes in the underside of the ottoman. With some patience and I few failed tries, I got all four tufts done.
After i recovered the ottoman, I realized how linen like the drop cloth looked and I loved it even more! After examining my large ottoman in the livingroom that actually is linen covered, I noticed it takes on an almost wrinkled look (as linen does) and decided to not worry about steaming the wrinkles out. I like the look of the wrinkles! Kind of like my husband’s eye wrinkles 😉.

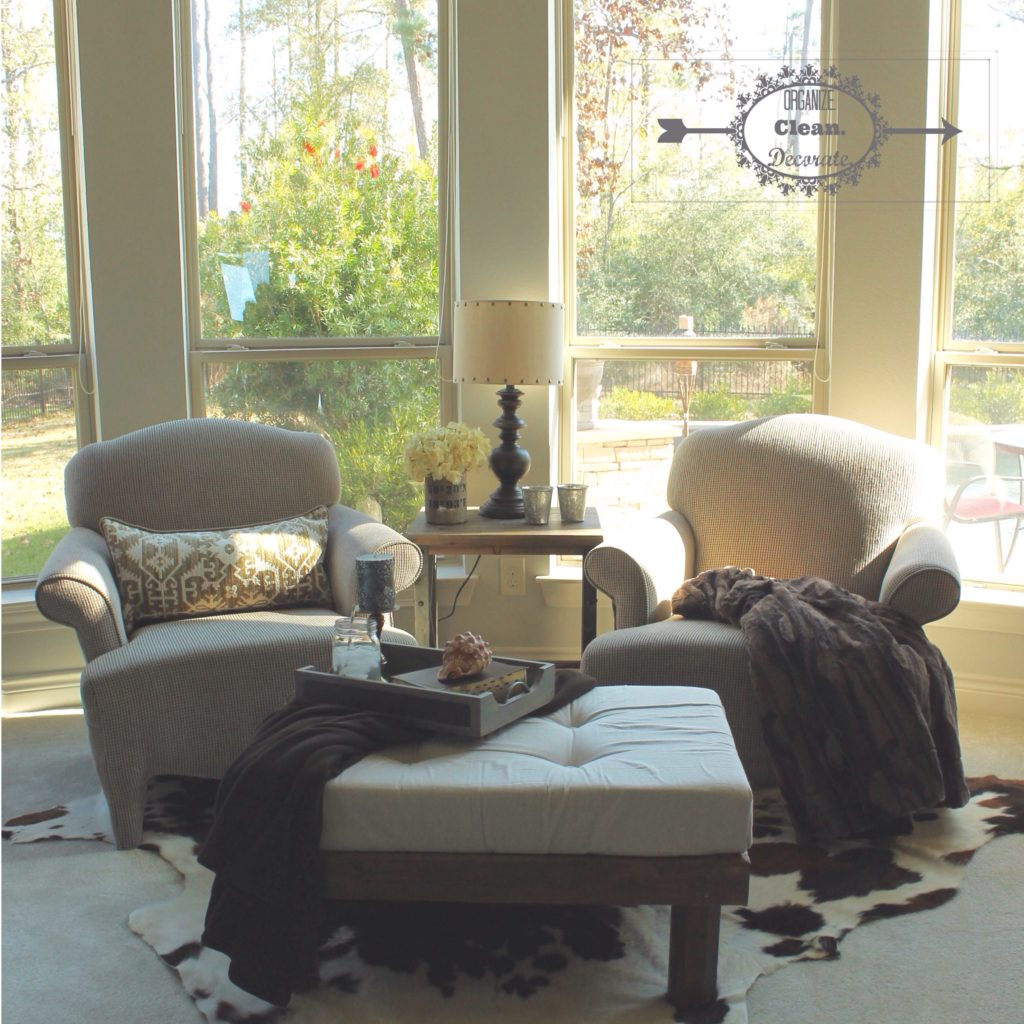
I decided the master bedroom was in need of a sitting area and this ottoman was my jumping off point. I anchored it with the cowhide rug that was in the gameroom in our last home, and after purchasing two new chairs for my living room, I put the chairs that were formerly in the living room in the master bedroom. After playing musical side tables around the house, I ended up with this table from At Home as the perfect spot to perch a lamp (also from At Home) and some accessories (again, from At Home). After a stop into TJMaxx for the perfect lumbar pillow, and a fur throw, my sitting area felt complete.
