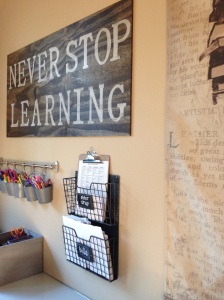
This sign was my first attempt at hand lettering on wood. I bought a piece of wood from Home Depot that was ready cut down to 2×4 ft. I mixed up three of my favorite Minwax stains: Jacobean, Early American, and Weathered Oak. A quick two coats with a cheapo brush later (plus a few hours of dry time) and I was ready to start lettering.
After typing my letters up in Microsoft Word at size 700 ( I think?) I printed one letter per page, then arranged them on the wood. I picked this panel of up at Home Depot for about $12. If you look (usually in an end cap) in the lumber section of Home Depot you will find a variety of craft panels of a few different sizes. No need to even get out the saw. This particular panel is 2ft by 4ft.
Using a regular ol’ pen, I traced one letter at a time, pressing down very hard. Once I removed each piece of paper I could faintly see an indentation on the wood which was my guideline for painting each letter. With an angled paint brush I went around the outline of each letter and and then went back to fill the rest of the letter in. I painted my letters using a combination of two paints I had laying around, leftover from other projects. The paint is basically a warm light gray color.
After the paint was fully dry I sanded the letters down slightly for a more aged look and added hooks to the back for hanging on the wall. If I had to do it all over again? I would just get out my Cricut and be happy with one of the fonts I have already! Lol! This did take me a few hours to complete.


Love it!!!